Step 1: Locate the Account

At the top of the page, you’ll see the navigation path (breadcrumbs):
📍 US1 IBlüm Test Campus → Accounts → Account ID (US1IT2025085043)
- Use this path to confirm you are in the correct account.
- Click the earlier steps (e.g., Accounts) to go back.
Step 2: Review Parent/Guardian Information

In the Parents / Guardians box:
- You’ll see the name, address, and phone numbers of the guardian.
- The email is clickable for quick contact.
- The Login Name is the unique system ID and is also known as the account number of the primary parent in this case it is US1IT2025085043.
- A link allows you to reset the account password if needed.
Step 3: Review Financials (Right Panel)


The Financials panel shows balances and payments:
- Balance: Current balance owed. If the amount is shown in parentheses, e.g. (188.00), it indicates that the family has a credit as of this week, and does not owe money for this week. If the account owes money, then it shows as a regular amount, e.g. 432.00 above. NOTE: iBlüm does not show the currency symbols internally.
- Overdue: Amount past due.
- Last Payment: Displays the last recorded payment in this case it is Aug 27, 2025
- Deposit: Any deposit available. IMPORTANT: The deposit is an amount that a parent pays as per the policies in effect for the facility, and is not used in the calculation of account balances. Therefore, 432.00 shown above could be offset with the deposit amount should a parent not pay on time.
- EFT/ACH: (Automated withdrawal Flag) Indicates if automated withdrawal of funds is set up. The first panel with -- shows that EFT/ACH is not setup. Any non zero value, indicates that the parent has signed up for EFT/ACH. The second and third panel above shows that EFT/ACH is setup for the other two families.
Step 4: Financials Links

Below the financials panel are quick action links:
1. Pay With PayPal – Process a payment online.
Use this option if a parent wishes to pay by card at the facility with the Administrator’s assistance. The amount that is displayed is the balance owing, but the actual amount that the parent pays may be adjusted on the screen below.

The final amount charged is the sum of the amount that the parent wishes to pay and a service charge (e.g. 3%) in this case. Upon choosing “Go to PayPal Checkout” the system redirects to the PayPal page.

- Select this option to continue with the payment process using PayPal.
- Follow the steps for payment processing on the PayPal website. It shows amount that will be charged on the card: $720 + 3% x 720 = $741.60

- On processing the payment successfully, the transaction gets added into the account statement for the family and the payment redirects back from PayPal to the Portal.
- When the payment completes successfully, the following entry may be found in the parent’s financial records. Refer to the View Transactions section below to learn more
IMPORTANT: Have the parent present in front of you while conducting this transaction, as you do not need to write down the credit card information of the parent.
Cancel Pay with PayPal Option

At this point, the administrator or the parent may not choose to proceed with the payment, in which case they can choose option 2, to return to the iBlum Portal.
The screen shot below shows a “failure” but indicates that you canceled the payment.

At this point, you can either choose option 1 or 2
2. Print Payment Schedule – Prints the payment schedule for an account for up 12 months in the future, based on the student enrollment profiles entered for that account. NOTE: This feature is not used extensively as most parents are now subscribed to EFT/ACH and do not pay by Cheques.

2. View Transactions – Provides a list of all financial transactions for a given account for a given period in time and can be filtered for all transactions, or only payments transactions or only charges.


Note: The last column now displays the user who entered each transaction. Historical entries will show up as "? Unspecified". Hover over the initials to view the full name, role, date, and time of entry.

Transactions only filtered for payments

Transactions only filtered for charges

3. View Current Account Statement – This link displays the most recent account statement for the family.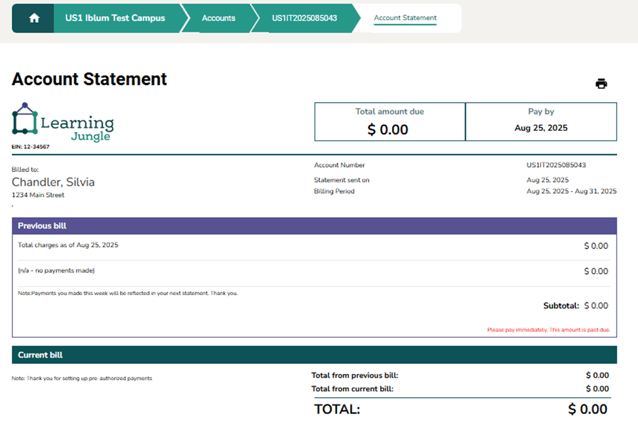
4. Enter Payment – Record a manual payment.
This option allows the administrator to enter a payment manually into the system such as Cash, Cheque etc. On occasion it may also be used make non-standard entries (EFT/ACH, Credit Card, PayPal) which have been affected by a parent through other means. E.g. Payment by PayPal was made but not through an invoice, but by directly visiting PayPal and choosing to pay there without a link to an invoice from iBlum
The iBlum portal, not only manages the enrollment of families and children and the programs they are in, but is geared to handling financials related early childhood services.
From the dropdown select the payment type. Then enter the amount paid followed by the description of the payment instrument (e.g. Cheque No, Money Order Number). Except for cash payments, the description field helps the financial team connect a payment to the actual physical / digital transaction for reconciliation purposes.

5. Update EFT/ACH – Add or change bank transfer setup.
This option is chosen, when a parent signs up to have funds deducted automatically from their bank account via EFT (Electronic Funds Transfer) during their registration, or even later.
Any non zero amount signifies to the system that this account is setup of EFT/ACH, and when periodic billing collection is done, these accounts are picked up for EFT processing by the backoffice team
Should a parent decide to revoke their EFT authorization, then simply enter 0.00 in the amount field, and then it no longer qualifies for EFT.

Prepare Upcoming Account Statement –
Creates a preview of the next account statement and more importantly allows manual adjustments (e.g. Additional Charges, Fee Credits to be added) before it is finalized.
This topic will be discussed in a separate document Account Detail Page – Prepare Upcoming Account Statement
6. Print Tax Receipts - Generates receipts for tax purposes.
This option is used to print the amount of childcare fees a parent in a given previous tax year. Tax receipts are usually printed in the second month of the subsequent tax year so that you can get an accurate record all payments and all NSFs (insufficient fund) cancellations for the account. The tax receipt clearly states information of both the family parent and children and the organization (TIN – Tax information number) and the actual amount paid.

Clicking on Continue, takes you to the tax receipts page as shown below.
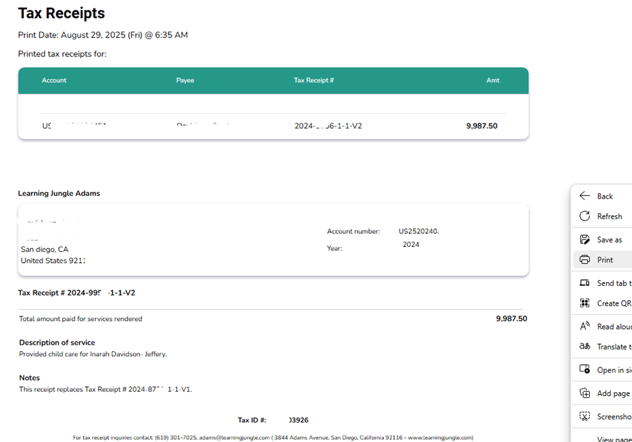
Right click on this HTML page to print the tax receipt into either a PDF or send it to a printer. The page is setup to print the tax receipt properly on the second page, with the first page being the summary page.
IMPORTANT: If the Administrator wishes to print several tax receipts at once, there is another option available in the Financials tab - Prepare and print tax receipts (Payments)
7. Fee Schedule - Displays the list of fees, subsidies, discounts and other financial parameters associated with the facility.
See sample below for a site showing fees and various discounts and charges.

✅ Best Practices
- Always confirm you are in the correct account before making changes.
- Keep parent contact details up to date so that you can reach out to them in the future for any reason whatsoever
- Monitor balance and overdue amounts regularly and take steps proactively to make sure the family is never exceeding their outstanding balances. In financials, once a amount is overdue, it becomes difficult to to